Creating an Updated Model Using Snapshots
When you want to update the model using information saved in snapshot files, start ModelBuilder for that element type. At the dialog for snap shot settings, select which previous snapshot should be used for the comparison.

You have the option of selecting the latest snapshot (default) or one that is older. you should select the "Preview Changes" box to view the changes made between the current state of the data source (e.g. GIS) and the selected snapshot.
Snapshot Preview
The snapshot preview presents the differences between the selected snapshot and the current state of the GIS in a tabular view.
The Tables
The left pane contains a list of the tables for each element type that are part of the ModelBuilder configuration.
The icon indicates the state of the table.

The right pane shows the individual values that have been changed since the snapshot was created as well as the data and time it was created.
In the preview below, if you leave the box checked, the change in the data source will overwrite the model value. If unchecked, the model value will be maintained. The changes become part of the current scenario (and its children) in the open model and will become permanent when the model is saved. Any new elements will also appear in scenarios that are not children of the current scenario but will be inactive. You need not accept all changes but can select which changes to import in the preview tables.
The Differences Table
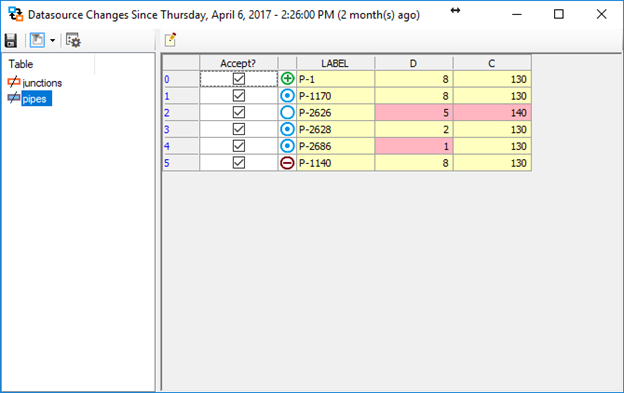
The right pane shows the differences for the selected table.
The first column is always the "Accept?" column. For an element with a modified state of ADDED, DELETED OR MODIFIED, this will be editable. For those elements with an UNMODIFIED state, this cell will be read-only.
Icons in the second column is a visual indicator of the state of that row.

The third column is the key field of the table. The label can vary depending on the settings (for example, this can be an existing Label, a new automatically generated <label> or a GIS-ID).
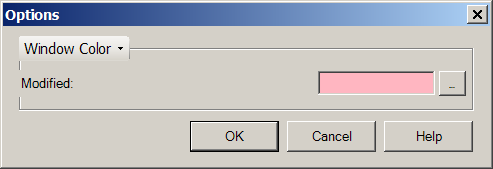
The columns following the key field are the mapped fields for the table. Differences between the snapshot and the current data source are highlighted. A difference is considered a change between the selected snapshot and the current data source state (not the model). The default highlight color is light pink. You can change the highlight color by opening the options dialog. See below for additional details.
If an element has a difference in its geometry, it will show the appropriate icon in the second column. Any differences in the mapped fields will highlight as well. If an element has a geometry change and a change in a value, the geometry icon is shown.
Global Edit
The global edit button is displayed above the right pane. You can also access global edit by right-clicking the "Accept?" column and clicking Global Edit to accept or not accept all rows. You can also select in the table and right-click and click Global Edit.
If you select in the table, the global edit operation will apply to the selection but only for rows with a state of ADDED, DELETED or MODIFIED. If only a single cell is selected the global edit operation applies to all rows in the current view with a state of ADDED, DELETED or MODIFIED.
Global editing only applies to rows currently in view.
Toolbar
- Save: The save button will write to the snapshot files the "Accept?" state for each row with a state of ADDED, DELETED or MODIFIED.
- Toggle Filter: This button
has a drop-down menu with five (5) options. Checking one or more options will
include those changes in the table in the right pane. Unchecking an option has
the opposite effect; for example unchecking "Show Value Changes" will exclude
rows where at least one mapped field has changed. The options include:
- Apply Filter: Toggles the currently defined filter on/off.
- Show Value Changes: Include rows where at least one mapped field has changed.
- Show Geometry Changes: Include rows where geometry has changed.
- Show Adds: Include those elements added to the model.
- Show Deletes: Include those elements removed from the model.
- Options: The options button opens the options dialog which controls the color of the changed table entries.
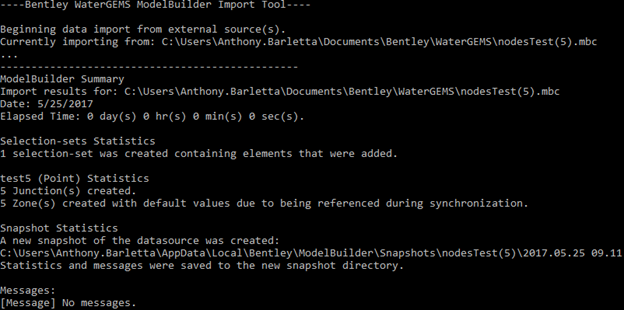
Summary and Notification Logs for Snapshots
When a snapshot is used to modify a model, ModelBuilder saves the summary and notification logs in the same folder as the snapshot. The ModelBuilder summary is shown below.
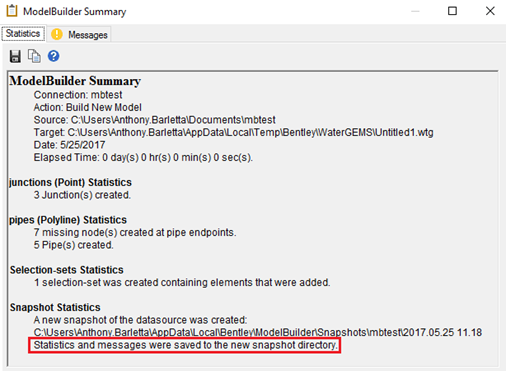
The logging feature keeps track of messages logged by ModelBuilder in a TXT file that can be read by Notepad o similar application.

The logging feature also works when using the ModelBuilder Batch Importer tool.